Exporting project data to CX
CADMATIC data, stored in the library and project databases, can be exported and imported in a proprietary CX format. This export–import process can be utilized for various purposes, such as:
-
Transferring selected data from one project to another.
-
Exporting an entire project to serve as a template for new ones.
In the case of selected data, the export–import cycle can be repeated as often as needed to propagate modifications across the participating projects. In multi-project scenarios, it is crucial to select and consistently adhere to a single export–import strategy.
Export–import strategies
COS objects store information about whether they represent the original object or if the object has been modified. When a COS object is exported from one project and imported into another, the modification status is included in the new object. This way, the same object can exist in multiple projects, and any further changes made to the original COS object can be propagated across all projects by repeating the export–import cycle.
The process of updating the modified objects is simple if there is only one importing project and modifications are only made to the original objects. However, if a COS object is modified in the importing project, re-importing the data from the original project will result in a new object being created. Furthermore, if there is a longer chain of participating projects, the sequence in which exports and imports are performed becomes more important and can influence whether the process will update objects or create new ones.
In multi-project scenarios, we recommend implementing data updates in one of the following ways, without mixing the methods:
-
Transfer data from Project 1 to all other projects, one project at a time.
-
If an object is edited in Project 1, repeat the export-import cycles to update the other projects.
-
If an object is edited in Project n, the association is broken: do not transfer that object from Project 1 into Project n anymore, unless you want a new object to be created.
-
-
Transfer data first from Project 1 to Project 2, then from Project 2 to Project 3, and so on.
-
If an object is edited in Project 1, repeat the export-import cycles to update the other projects.
-
If an object is edited in Project n, the association chain is broken: do not transfer that object from Project n's parent project into Project n anymore, unless you want a new object to be created.
-
Exporting selected objects
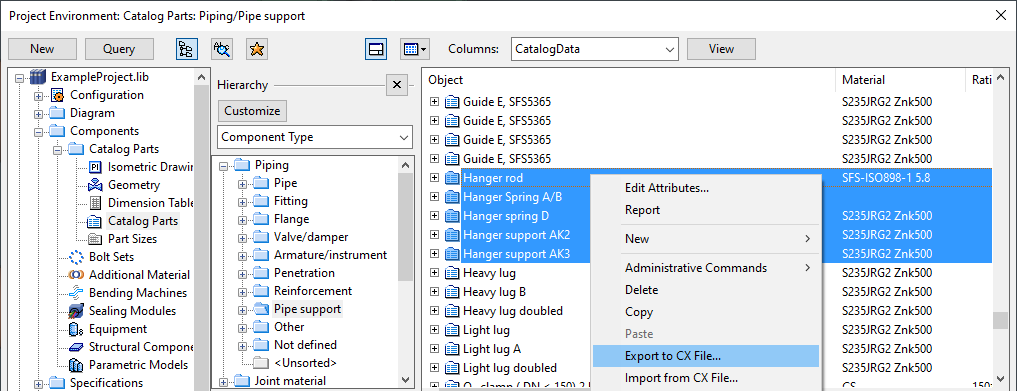
All object browser dialogs allow the export of selected objects to a .cx file. This file can then be imported with the Import from CX File context-menu command, either to the same project or a different one.
This can be used to transfer objects between projects, create a backup before making significant changes to an object, or to create a file that can be sent to Cadmatic Customer Support if errors are detected in a COS object.
-
In an object browser dialog, select the objects to be exported.
-
Right-click the selection and select Export to CX File from the context menu.
The Export Objects wizard opens, showing the name of the COS server, the project database, and the library database.
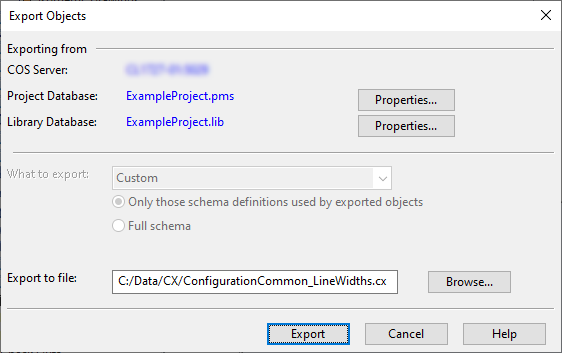
You can click Properties to show information about the project or library database.
Note: What to export is set to "Custom" to indicate that you have manually selected the items to be exported.
-
In Export to file, specify the export folder and the file name.
-
Click Export.
-
When the export is completed, review the report and then click Finish.
Exporting a project
Using the CADMATIC desktop, you can export project data (including project settings, project library, model objects, documents) to a .cx file. This exported file can then be used as a template for creating new projects. This can be done during the creation of a new project or while managing an existing one.
-
Open the Export Objects wizard.
- If you are in the Manage Project dialog, click Export.
- If you are in the Configuration Setup page of the Create Project wizard, select Live Project, select the COS server and the project to export, and click Next.
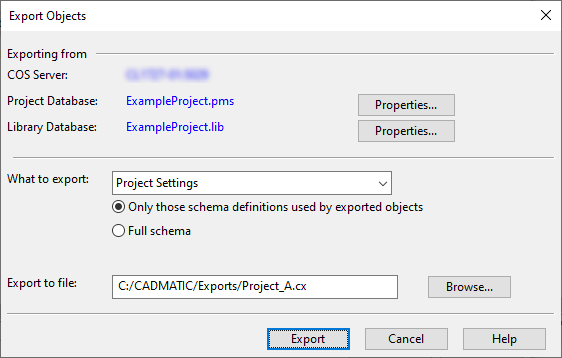
The Export Objects wizard opens, displaying the names of the COS server, the project database, and the library database. For each database, you can click on its respective Properties button to view more information.
-
In What to export, do the following:
-
Select what to include in the export file.
-
Full library – Select this to export the complete library database. If not selected, only the library objects used by other objects in the export will be included.
-
Project settings – Select this to export the project settings: configuration objects, systems, and specifications.
-
Project content – Select this to export the groups and the 3D model objects.
-
Include documents – Select this to export all documents.
-
Include Hull parts – Select this to export Hull objects.
-
-
Select what part of the database schema to include in the export file.
- Only those schema definitions used by exported objects – Select this to export only those attributes that are assigned to an object type. If an attribute is of type "enumerated", then only the used choice values are exported.
- Full schema – Select this to export all attributes, including the unassigned ones.
-
-
In Export to file, specify the export folder and the file name.
-
Click Export.
-
When the export is completed, review and close the export report, and then click Finish to close the export wizard. If there were any warnings during the export, they are listed in the message pane at the bottom of the Manage Project dialog or the CADMATIC desktop.
